
How to enable or disable USB ports in Windows
A PC user can never be careful when it comes to keeping data safe. Imagine that at home or in the office, when you do not expect danger on the Internet, the danger may come from your loved ones and colleagues. After all, you can simply insert a flash drive with a virus into a USB port and steal your data or damage the system. Removing your computer’s USB drives can help keep your files safe. There are several methods that you can choose for yourself if you decide to deactivate the USB ports.
How to enable or disable USB ports on Windows 10/8/7
1. Using Registry Editor
Warning: Before Working with the registry, I recommend to create a system restore point.
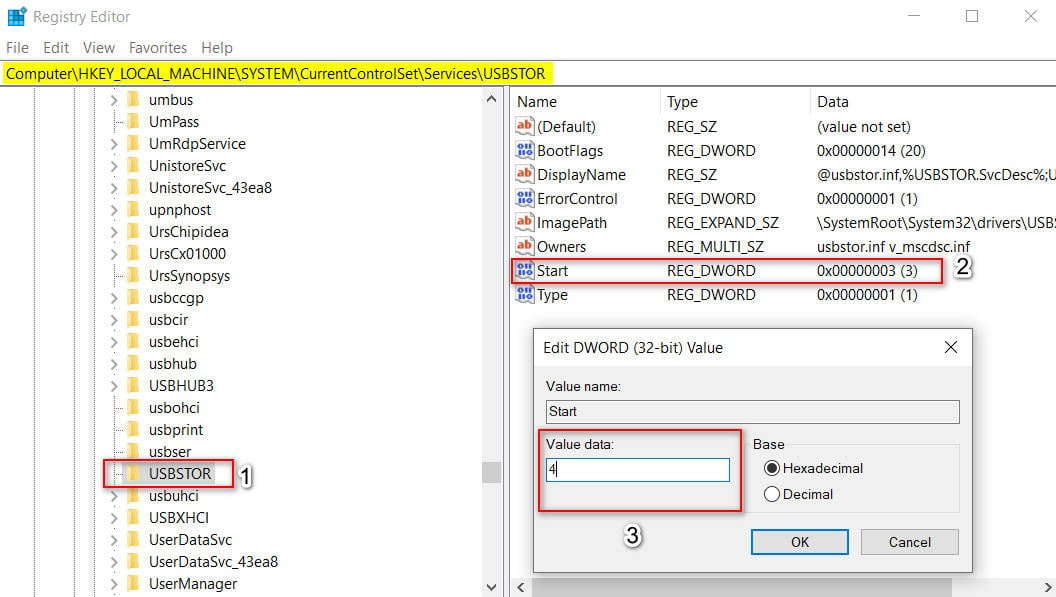
Press the key combination Win + R and enter regedit. In the registry, go to HKEY_LOCAL_MACHINE \ SYSTEM \ CurrentControlSet \ Services \ USBSTOR and find the Start option on the right. Click on it two mouse clicks and set the value to 4 to disconnect the USB ports. If you need to re-enable USB ports, change to default value 3.
Related post : LSASS.exe: what is LSASS.exe process and how LSASS.exe works in…
2. Using Group Policy
Note: Group Policy Editor is available in Pro versions and above. In the version of HOME it is not, use the method through the registry, if you have a version of home. You can also make a group policy editor in the home version at the link.
Click the Win + R button combination and enter gpedit.msc to open the group policy editor. Next, go to the “Computer Configuration”> “Administrative Templates”> “System”> “Removable storage access” parameters and on the right, find two parameters Removable disks: Deny read access and Removable disks: Deny write access. Double-click on them to open the options and select Enabled. Thus, the USB ports will be disconnected, to turn them back on just do exactly the opposite.

Related post : How to add translator to Microsoft Edge


